Friday, June 27, 2014

Back From The Dead!!!! And At LegoLand!!

Sorry it's been a while! With school and work and the end of the kid's school year, it's just been hectic. BUT, now I'm back from the dead and coming to you with some LegoLand inspired nail art!! More details below!


So the fam-bam and I are going to be spending the night at the LegoLand Resort here in beautiful Carlsbad, California. Now this is a bit farther away from home than we normally go for just a night, Los Angeles is a few hours away from Carlsbad. But, since "Little Bit" (aka my daughter) is going to Grorgia for a month, it's a great chance to get one last family trip in before hand! So why not LegoLand?? 

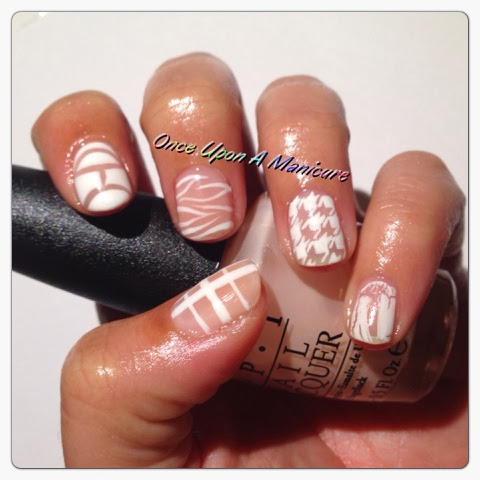
So for this mani I had to use some different materials than I normally use. I'm normally a paint and polish type of chic. I dabble with 3D acrylic and for this one I looked at it as a challenge. I've seen other girls use rhinestones or studs and, quite frankly, I just didn't feel like wasting my rhinestones by painting over them. But acrylic gives a much more solid base to cover with polish.


I just got a small bead of acrylic, took the liquid out of the back while it was on the brush, plopped it on the nail, waited for it to get matte then patted it down just a touch with the belly of my Kolinski brush. Then I painted over with the three original formula Sally Hansen colors: Pacific Blue, Mellow Yellow and Coral Reef. Lastly, I applied a matte topcoat, specifically Essie's Matte About You.

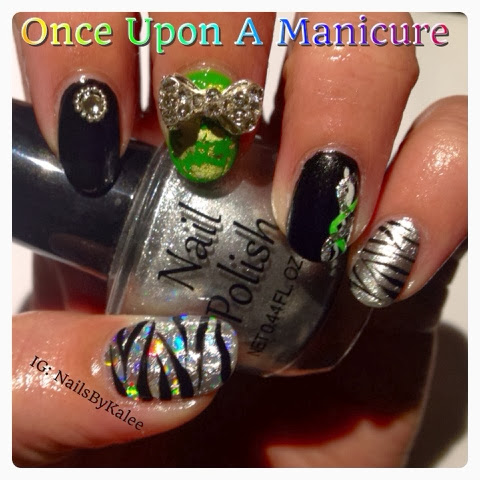
Painting the Lego logo was pretty easy. I started with a black base, added the white "Lego" then left a little bit of black and outlined with white. Then, I left a bit more black and painted the rest of the nail white to prime for the red. This gave it a black outline and background. The outline is yellow and the background is red so I used acrylic paint for the yellow lines and red polish for the background. 


Hope you guys like! I'll be posting more on Instagram and Facebook from LegoLand itself so make sure to follow! 

Twitter: @NailsByKalee
Tumblr: NailAbuse.tumblr.com
Instagram: @NailsByKalee
My Blog: OnceUponAManicure.blogspot.com
Facebook: Facebook.com/OnceUponAManicure


Sunday, March 16, 2014

St. Patrick's Day Nail Art

Today on the blog, I've got some fun water marble blingy nails! I even added a bit of 3D acrylic work! Since everyone's doing shamrock and clover water marbling and hand painting, I thought some rainbow water marbled backgrounds would be fun and different. More info after the jump!! 


The colors I used for the water marble are OPI Koala Bear-y, Hot & Spicy, Need Sunglasses, Green-wich Village, No Rules For The Blues and Plugged-In Plum. Aren't they so pretty together?


So then I went over with Sephora by OPI's gold flavor polish in a bit of a swirl, then went in with pretty much every bit of gold bling and studs I have to include some additional gold leafing. 


To keep it with the St. Patrick's Day theme, I made a little cast iron looking pot out of INM black acrylic and placed it on my ring finger to make it look like the gold was swirling around out of the pot!


Hope you guys like! Be safe on St. Patrick's Day! I'll be working :( But at least my nails will look great!! Come find me:

Twitter: @NailsByKalee
Tumblr: NailAbuse.tumblr.com
Instagram: @NailsByKalee
My Blog: OnceUponAManicure.blogspot.com
Facebook: Facebook.com/OnceUponAManicure

Monday, March 3, 2014

March Nail Art Challenge - Intro and Day 1 Rainbow Brite Dotticure

So for today's nail art, I've taken inspiration from @Californails' March nail Art Challenge Day 1 which is "Dotticure". Here's her challenge:


Now, I didn't just want to do a polka dot mani cause quite frankly, it's been done. And done and done and done. So I figure it would be a cute way to integrate some actual nail art rather than just my dotting tools. To do this, I incorporated rainbow dots with Rainbow Brite!! Here's my design:


I used the Color Club Brites Collection and acrylic paint for all of the art. I did a line of dots in rainbow colors and to keep it from being super polka dotty, I framed the dots in black. Just one more picture with a little better design breakdown:


Alright, so now I'm going to go work on my painting skills since my Rainbow Brite looks stoned... Stay tuned for the next challenge post, "Gradient" which should be up tomorrow! And come find me:

Twitter: @NailsByKalee
Tumblr: NailAbuse.tumblr.com
Instagram: @NailsByKalee
My Blog: OnceUponAManicure.blogspot.com
Facebook: Facebook.com/OnceUponAManicure


Sunday, February 23, 2014

Sparkly Camo Nails!

So, I've now been out of the Army long enough to officially enjoy camo nails again. Yes, they're still a bit over played but I like them when there's a less subtle form of camo. All ten nails in woodland camo is just a bit too much. Well, here's what I came up with!


I really showed my OPI drawer some love with this one showcasing My Vampire is Buff, Glitzerland, My Favorite Ornament and 4 In The Morning. I also added some blingy Swarovski elements in pink and opalescent clear with gold square stud, ring and spike accents and a pearl in the center for the middle and some square studs down 4 In The Morning for some flare.


Hope you guys like them! For more, come find me on: 

Twitter: @NailsByKalee
Tumblr: NailAbuse.tumblr.com
Instagram: @NailsByKalee
My Blog: OnceUponAManicure.blogspot.com
Facebook: Facebook.com/OnceUponAManicure


Tuesday, February 18, 2014

Claire's Glow in the Dark Review and Nail Art!

Today I have a fun and bright neon, glow in the dark design featuring Claire's Glow in the Dark polishes. They come in unnamed pink, yellow, green and purple shades and retail for $7 each. They even include a little light inside the cap that shines down the brush and into the polish so I guess, technically, you could even use these to polish your nails in the dark! Anyway, these were really fun to work with, so continue reading for more!


The first thing I noticed is that these polishes separate very easily so from time to time shaking may be necessary. Also they tend to be a big sheer and dry completely matte! I layered the Claire's polishes over Color Club's City Brites collection pink, yellow, green and purple shades to provide enough color.  

For the "bubbles" I just used very watered down white acrylic paint and placed circular drops then removed the middle of the droplet with a dry brush.

Now with the glow in the dark part, only once thin coat was needed in order to get amazing glowing results. So with all that, here's the design!


Wanna see it glow? Here it is!
 

Thanks guys! Hope you enjoyed! Come find me:

Twitter: @NailsByKalee
Tumblr: NailAbuse.tumblr.com
Instagram: @NailsByKalee
My Blog: OnceUponAManicure.blogspot.com
Facebook: Facebook.com/OnceUponAManicure

Friday, February 7, 2014

Round-Up of the January Nail Art Challenge

As you guys know, I took part in Californails' January "Totally Doable, I Have A Life" Nail Art Challenge. You may not know that this was also my first official nail art challenge. Contests and "inspired by" type things but never a full month-long challenge. Since I managed to stick with it, I figured I would do a round up so everyone can know which manis were which days and so on... So here's the collective round up shot and the breakdown comes after!


03: fresh


06: sparkles


09: pattern


11: pastel blue


14: nature


16: gradient


19: sweets


22: studs


25: match OOTD (ISSE weekend)


28: re-creation (@thenailboss)


31: silver


My thanks goes out to @Californails for hosting this challenge and those of you who have followed me through this whole process. This was so much fun and was really a great set of topics! Can't wait to try another one soon but I think I'll be taking a month or so off... Not because they aren't fun, just because the pace was a lot. It's alright though, stay tuned because I'll still be posting all of my personal nail art! Find me on:

Twitter: @NailsByKalee
Tumblr: NailAbuse.tumblr.com
Instagram: @NailsByKalee
My Blog: OnceUponAManicure.blogspot.com
Facebook: Facebook.com/OnceUponAManicure

Friday, January 31, 2014

Day 31 "Silver" Manicure

I couldn't ignore the last day of @Californails' January Nail Art Challenge!! And I managed to make it in time! I have had so much fun doing this challenge and I can't wait to make my little round up of all of them! Any who, the topic is "Silver" and I chose to do some fun funky disco ball looking zebra print, foil and bling!! So here they are:

 
I used a 99 Cent Store silver on the pinky and thumb, Sinful Colors' Black on Black for the ring and index and Formula X by Sephora in Radioactive for the middle finger. I added a Swarovski Crystal and silver bullion to the index and some squiggly lines on the ring. I used silver (yes, prior to top coating, it was silver) foil on the middle finger and added a bow. The zebra print was done with a Milani nail art polish in Black Sketch.


Alright so that's it for the January Nail Art Challenge! I had so much fun!! I'll be posting some hand painted stuff from now on rather than inspired stuff. I really need to get back into painting, I miss it so much!! So be ready guys, it's going to be intense! 

Come find me!


Twitter: @NailsByKalee

Tumblr: NailAbuse.tumblr.com

Instagram: @NailsByKalee

My Blog: OnceUponAManicure.blogspot.com

Facebook: Facebook.com/OnceUponAManicure


Valentine's Part Deux

The second Valentine's Day mani I'll be posting is a wonderful "re-creation" nail art (hint hint Day 28 of the January Nail Art Challenge) inspired by the great Phong Luu a.k.a. @TheNailBoss on Instagram! His beautiful crisp lines were not exactly translated in my nails but I tried my best! I used Formula X for Sephora's White Matter and Dark Matter (as usual) and Azature's stunning Pink Diamond then added some pearls and Swarovski crystals to create this beautiful eye-catching Valentine's Day look! So here they are:


I had so much fun re-creating (and staring at) this beautiful set of nails! As always, I hope you enjoyed you know where to find me!

Twitter: @NailsByKalee
Tumblr: NailAbuse.tumblr.com
Instagram: @NailsByKalee
My Blog: OnceUponAManicure.blogspot.com
Facebook: Facebook.com/OnceUponAManicure

Friday, January 24, 2014

Valentine's Day Nail Art

So here's the first of my Valentine's Day nail art posts! I personally hate cutesy hearts and stuff for Valentine's Day, but I guess I can't avoid it so I just made my own little spin on hearts and stuff! Better pictures after the jump!


So, as you can see I put a little bit of pride into these nails with my equality heart and the two female symbols holding a heart. For this mani, I graduated a sheer nude color to a pink/red color then threw in a french manicure. On the thumb, I made a heart "camo" pattern in different shades of pink and black. On the two simpler nails, I made some lace and swirls with acrylic paint. 


Hope you like and feel free to find me on:

Twitter: @NailsByKalee
Tumblr: NailAbuse.tumblr.com
Instagram: @NailsByKalee
My Blog: OnceUponAManicure.blogspot.com
Facebook: Facebook.com/OnceUponAManicure

Big Bear and Stud Nails

So, the family trip up to Big Bear was last weekend and, man, did we have a blast! There wasn't much snow (thank you global warming) but we still had so much fun!! And everyone got their nails done by yours truly! 

For my cousin Hazel, we did a fun color pop mani featuring Formula X for Sephora's __________. 


Gotta love the ugly upholstery on this chair, right?? 

Then on Sarah's nails I used Furmula X by Sephora's _______ with a glitter placement of OPI's I Snow You Love Me.


Then for my #1 fan, Miss Arlene, I did my January Nail Art Challenge, day 22 "studs" mani using OPI's Princesses Rule, Pink Diamond by Azature and various studs, stones and caviars. 

Hope you guys enjoy! Feel free to find me on:

Twitter: @NailsByKalee
Tumblr: NailAbuse.tumblr.com
Instagram: @NailsByKalee
My Blog: OnceUponAManicure.blogspot.com
Facebook: Facebook.com/OnceUponAManicure

Wednesday, January 15, 2014

Rainbow Double Gradient "Reciprocal" Nails

For the next January Nail Art Challenge post, I bring you: Rainbow Reciprocal Gradient Nails!! I originally saw SimpleLittlePleasures' video on YouTube showing how to do a two-toned reciprocal gradient (which I believe SHE had gotten the inspiration from someone else to do). But the second I saw that gradients were one of the prompts for Californails' challenge, attempting this with rainbow colors was something I was secretly dying to do ever since I saw the video (probably a over a year ago)! This was, in theory a relatively easy concept and SimpleLittlePleasures did a wonderful job of demonstrating how easily this effect can be achieved. However, when putting this concept into practice, I found it to be much less smooth than her video suggested. I'm not sure if this was because of the wide range of colors that I used or what but for some reason the process was slightly more frustrating than I had anticipated. 

As with any multicolored gradient I started with a base of white so the neon colors would pop a bit more. Then I went over it with a make up sponge with LA Colors' Brites Collection (unnamed polishes from a set I got at Ross) in rainbow order starting with pink near the cuticle area ending with purple closest to the free edge. Here's a picture of the polishes since they don't have names:


Once I had gone over these two to three times, I laid down striping tape. Three pieces per nail. Then I went back over with a make up sponge full of white until it was semi-opaque (so as to cover up the darker blue and purple shades. Once that was dry I went over it with the LA Colors in rainbow order, but this time I did it with the purple at the cuticle area and pink near the free edge (AKA I turned the sponge around). Once I botched a few by not turning the sponge around and reapplied the process all over again, I ended up with a super funky, getting looks all over town, rainbow design that would make Lady Gaga herself pass out! Oh? and I topped off the whole thing with Seche Vite top coat!


Hope you guys like it! This is definitely one of my all time favorites and I plan on wearing this to every Gay Pride event I ever attend! Stay tuned for more! Feel free to find me on:

Twitter: @NailsByKalee
Tumblr: NailAbuse.tumblr.com
Instagram: @NailsByKalee
My Blog: OnceUponAManicure.blogspot.com
Facebook: Facebook.com/OnceUponAManicure

My Three Day Combo!!!

For day 14, 16 and 19 of @Californails' January Nail Art Challenge, I decided to combine the three concepts of "nature", "gradient" and "candy" into one outrageous mani! 


The first piece of the concept was the graduated blue through the nails showing the end of a thunderstorm. I miss thunderstorms so much having moved from New Jersey to California (we don't get many thunderstorms out here in Los Angeles). 


 So then I put a rainbow on the thumb because they're also one of my favorite parts of nature. They're such a wonderful symbol of renewal and rejuvenation!


So the last part I wanted to incorporate was a lollipop flower! I used acrylic to make a flat white round then painted the outline and spiral with acrylic paint. 

 
I hope you guys love this mani!! If so, let me know! Find me on:

Twitter: @NailsByKalee
Tumblr: NailAbuse.tumblr.com
Instagram: @NailsByKalee
My Blog: OnceUponAManicure.blogspot.com
Facebook: Facebook.com/OnceUponAManicure

Friday, January 10, 2014

Pastel Blue Nails!!

On to the fourth post for the January Nail Art Challenge series! Today's prompt was "pastel blue". I used a beautiful Tiffany blue by Formula X for Sephora  called Unmistakable. I personally got this color from The Twenty Two set that they put out during the holidays and I'm so glad that the set included this yummy pale blue color. So without delay here are my "pastel blue" nails!


I figured it was only appropriate to put a bow and lots of rhinestones and pearls because having such a Toffany blue color on my nails just makes me crave diamonds!!! I used white acrylic by ASP for the bow and frills and some pearls and rhinestones I had from a Christmas nail art wheel from Sally Beauty Supply. I also threw in a bit of OPI's White Shatter for a bit of a rough look (can't be 100% frills and lace). 


Well I hope you like them! Stay tuned for the next post, coming up on the 14th!

Don't forget to find me on:

Twitter: @NailsByKalee
Tumblr: NailAbuse.tumblr.com
Instagram: @NailsByKalee
My Blog: OnceUponAManicure.blogspot.com
Facebook: Facebook.com/OnceUponAManicure

Pattern Nails!!

A bit late again, but here's my 5 minute nail mash up of some cool geometrical patterned nail wraps that I got from the 99 Cent Store. 🙊! Yes, I said the 99 Cent Store. Crazy, I know! These are for January 9th of the the January Nail Art Challenge put on by CaliforNails... So here they are:


Please don't mind my stained thumbnail... But this is what I created, literally in about 5 minutes. These wraps don't last very long but when it's for an every two to three day nail art challenge, I think it's ok. 

If you want to see better "patterned" nails, please see my first nail art challenge post where I did 5 different patterns in white over OPI's Bubble Bath

I got these wraps for only a dollar and there are many more styles available. Here's all of the pretty ones I snagged so far:


Thanks guys and I hope you enjoyed! Stay tuned for the next January Nail Art Challenge post coming tomorrow!!

Wednesday, January 8, 2014

Color Club 2013 Halo Hues Collection

Today I have a swatch/review of the 2013  Halo Hues Collection by Color Club. Now this is the first set of Color Club polishes I've ever bought as I tend to be very cautious when trying new brands unless they are on sale or gifted to me. But the second I heard about these, I had to get them. These shades all have a fun eye catching, full spectrum, linear holographic effect that is visible in almost any light. The trends this year have already been predicted by many to include holographic glitters and polishes. I can't wait to have fun using these in future nail art! So, here they are! 


The first in the series is a rosy pink shade with a full spectrum holographic effect called Miss Bliss. The holographic effect is almost, dare I say, stronger than that of OPI's DS Signature! The color is a bit brighter than it as well.


Cosmic Fate is a burnt orange to copper polish with another stunning linear holographic effect. I really like this one and I'll probably be using it straight into next fall!


The next swatch is of a beautiful bright sage green (if that makes any sense) holo polish. Now, I've never been much of a fan of green polish outside of St. Patrick's Day, unless it's a minty lighter green. But let me just say, this one has made me a believer. While it may not be my next full manicure, I'm very glad to add it to my repertoire.


Ugh, I cannot get enough of Over The Moon. This deep bright blue color is incredible, which is kind of ironic since it was, in my opinion the least holographic in the collection. However, this ranks 3rd in my top 3, for sure.


This next one comes in at number 2, Eternal  Beauty! A bright yet deep purple with holo? Count me in!


I have saved the best for last! My number one top favorite in the Color Club 2013 Halo Hues Collection (and probably my all time favorite new holo polish!: 

Beyond!!!! With an awesome gunmetal base and some stunning holographic angles, this has got to be the most amazing holo polish I've seen in person. It's on all ten fingers right now and will be until my next #nailartjan Challenge post.


I purchased this collection of polishes myself. They retail for $10 per 15ml/0.5oz bottle at shopcolorclub.com.

Thanks and stay tuned for more! Don't forget to find me on:

Twitter: @NailsByKalee
Tumblr: NailAbuse.tumblr.com
Instagram: @NailsByKalee
My Blog: OnceUponAManicure.blogspot.com
Facebook: Facebook.com/OnceUponAManicure